In later posts in this series I want to talk about using plugins to backup your database, but in this post I want to go back to basics and take you through manually backing up your database with the MYSQL tools your hosting company provides.
I want to do this to give you an understanding of the database and what is required of a manual backup before we move onto automating this process with plugins.
What To backup
WordPress uses a database system called MYSQL to store all of the variable data of your site.
To create an adequate database backup you need to backup all of the system tables created by WordPress and all of the additional tables created by plugin installs or related but none WordPress systems such as forums or affiliate software.
A quick glossary of terms, a database is a container for all of your data, you will have one database per WordPress install. The database will contain many tables, tables are containers of collections of data organised by purpose. For example there is a table for your posts, a table for your users and passwords etc.
Why You Need To Backup Your Database
Your blog is a dynamic thing, every time you add a post, receive a comment , get a link, changes are made to your database. All variable options of your site such as users, revision history of your posts, categories, plugin data and tags are all stored in tables inside of your database. This needs to be archived on a regular basis so you can recover in the event of a system failure.
How It Is Backed Up
My Preferred method is to save an export of the database. This is a file containing all of the commands necessary to recreate the tables and then to populate the tables with data and to setup any relationships such as indexes.
For the rest of this tutorial I will focus on using the phpmyadmin utility. This is the most widespread MYSQL admin tool supplied by hosting companies. Please contact your hosting company for details on accessing phpmyadmin.
For full details of this tool please visit www.phpmyadmin.net
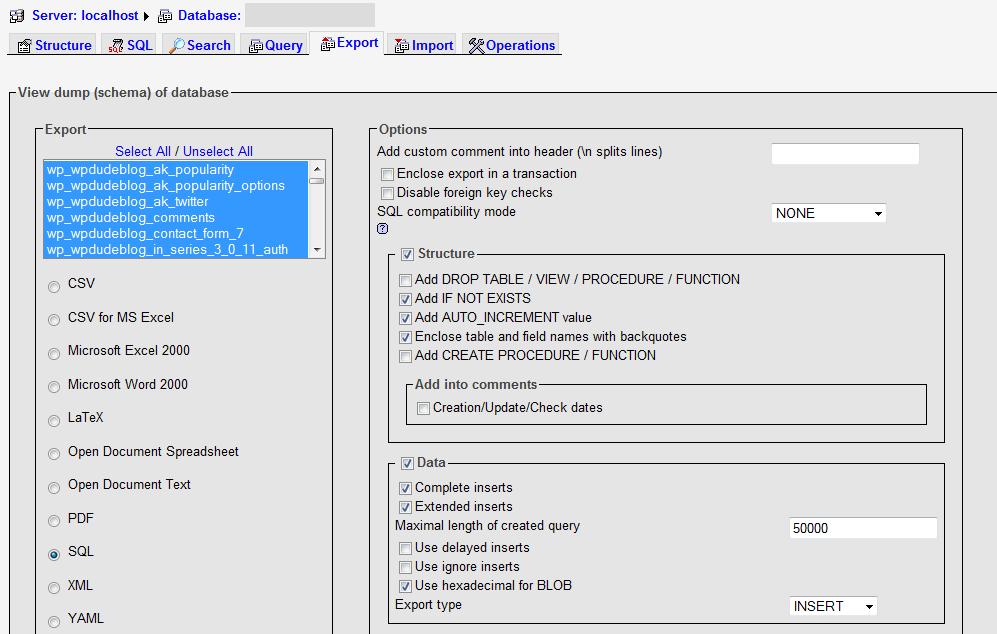
Once in your phpmyadmin tool, select the database your wordpress install uses and then navigate to the export tab, you will see the screen shown below:
Make sure that you check the Add DROP TABLE /VIEW/PROCEDURE options to make recovery in the event of a catastrophe easier.
As I have said I like to export the database as a SQL file of commands, this is selected in the left hand column, lastly I like to save the file to my local file system, this is done by clicking on save as file near the bottom of the page.
Once done, click on go and an export file will be created, this will take a certain amount of time dependant upon the size of your database.
VIDEO: BackingUp Your WordPress Database
Running time for this video is approximately 6 minutes.
[S3 bucket=wpocbackupdatabase text=View the video>>]backupdaatabase.html[/s3]
Discuss this Post
If you would like to discuss this topic, please leave a comment.
Next In the Series
The next part of the backup and recovery tutorial looks at backup using plugins.

